 Steps for Popcorn Ceiling Removal
Are you tired of your dated popcorn ceiling and want to swap it for something smoother and more modern? Popcorn ceiling removal is certainly a project you can do yourself, but it’s not as easy as simply scraping away the bumps. There are several pitfalls you’ll want to avoid along the way. Below, we provide some details on this process and how you can most easily achieve the perfect appearance for your ceiling.
Key Steps for Successful Popcorn Ceiling Removal
Popcorn ceilings were once the most popular choice for residential buildings thanks to their sound-absorbing qualities and ability to mask imperfections. These days, though, most homeowners prefer a smooth ceiling over a highly textured one. If you fall into this category and are thinking about making this a DIY endeavor, here are the steps you’ll need to take to make the switch.
Testing for Asbestos
One of the reasons many homeowners prefer to leave this project in professional hands is that doing it safely requires getting a sample tested for asbestos. Should you be determined to go the DIY route anyway, you can purchase a kit from the hardware store and send off the sample you acquire to a lab. Just be sure to don all the appropriate safety gear, including eye protection and a mask, before attempting this.
Preparing and Protecting the Room
If the test comes back negative, you can move on to the preparation phase. Popcorn ceiling removal involves making a big mess, so don’t underestimate the need to protect everything from the floors to furnishings and walls. Large plastic drop cloths can be used for this purpose. Avoid canvas alternatives as you will be using a lot of water during the removal process, and moisture can easily soak through the canvas.
Removing Any Lighting Fixtures
Next, turn off the circuit breaker and get to work removing any lighting fixtures or fans on the ceiling. While this may seem unnecessary at first, it’s a must as they’ll only get in your way when you are working, and you don’t want to risk spraying the electrical fixtures with water.
While the power is off, go ahead and cover any electrical boxes found in the ceiling using painter’s tape. This will keep them protected from moisture.
Spraying the Ceiling
Misting the ceiling with a garden pump sprayer will limit the amount of dust produced by the scraping motion and also allow the texture to come off more easily. Working one small section at a time, let the moisture sit for about fifteen minutes before you begin scraping.
Scraping Away
As you scrape each misted area, hold a mud pan underneath to avoid having all of the wet popcorn falling on the floor. Repeat this and the above step until the entire surface area of the ceiling has been scraped.
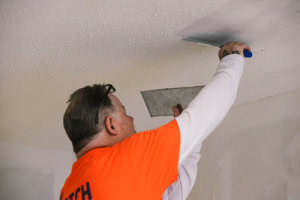
Smoothing, Priming, and Painting
While scraping will free your ceiling from the popcorn texture, it won’t automatically leave it with a smooth surface. That’s where a sander comes in. Let the ceiling dry for a minimum of 12 hours, and then use a sander prior to priming and painting it.
Take a More Efficient Approach to Popcorn Ceiling Removal
Popcorn ceiling removal can be done without professional assistance, but it’s a lengthy, labor-intensive process. To fast-track your way to a smoother ceiling, call the experts at The Patch Boys. We will leave you with sleek, elegant ceilings and help you sidestep all the hassle that this DIY project entails. Call 1-844-99-PATCH today to get started!